Car GPS Tracker
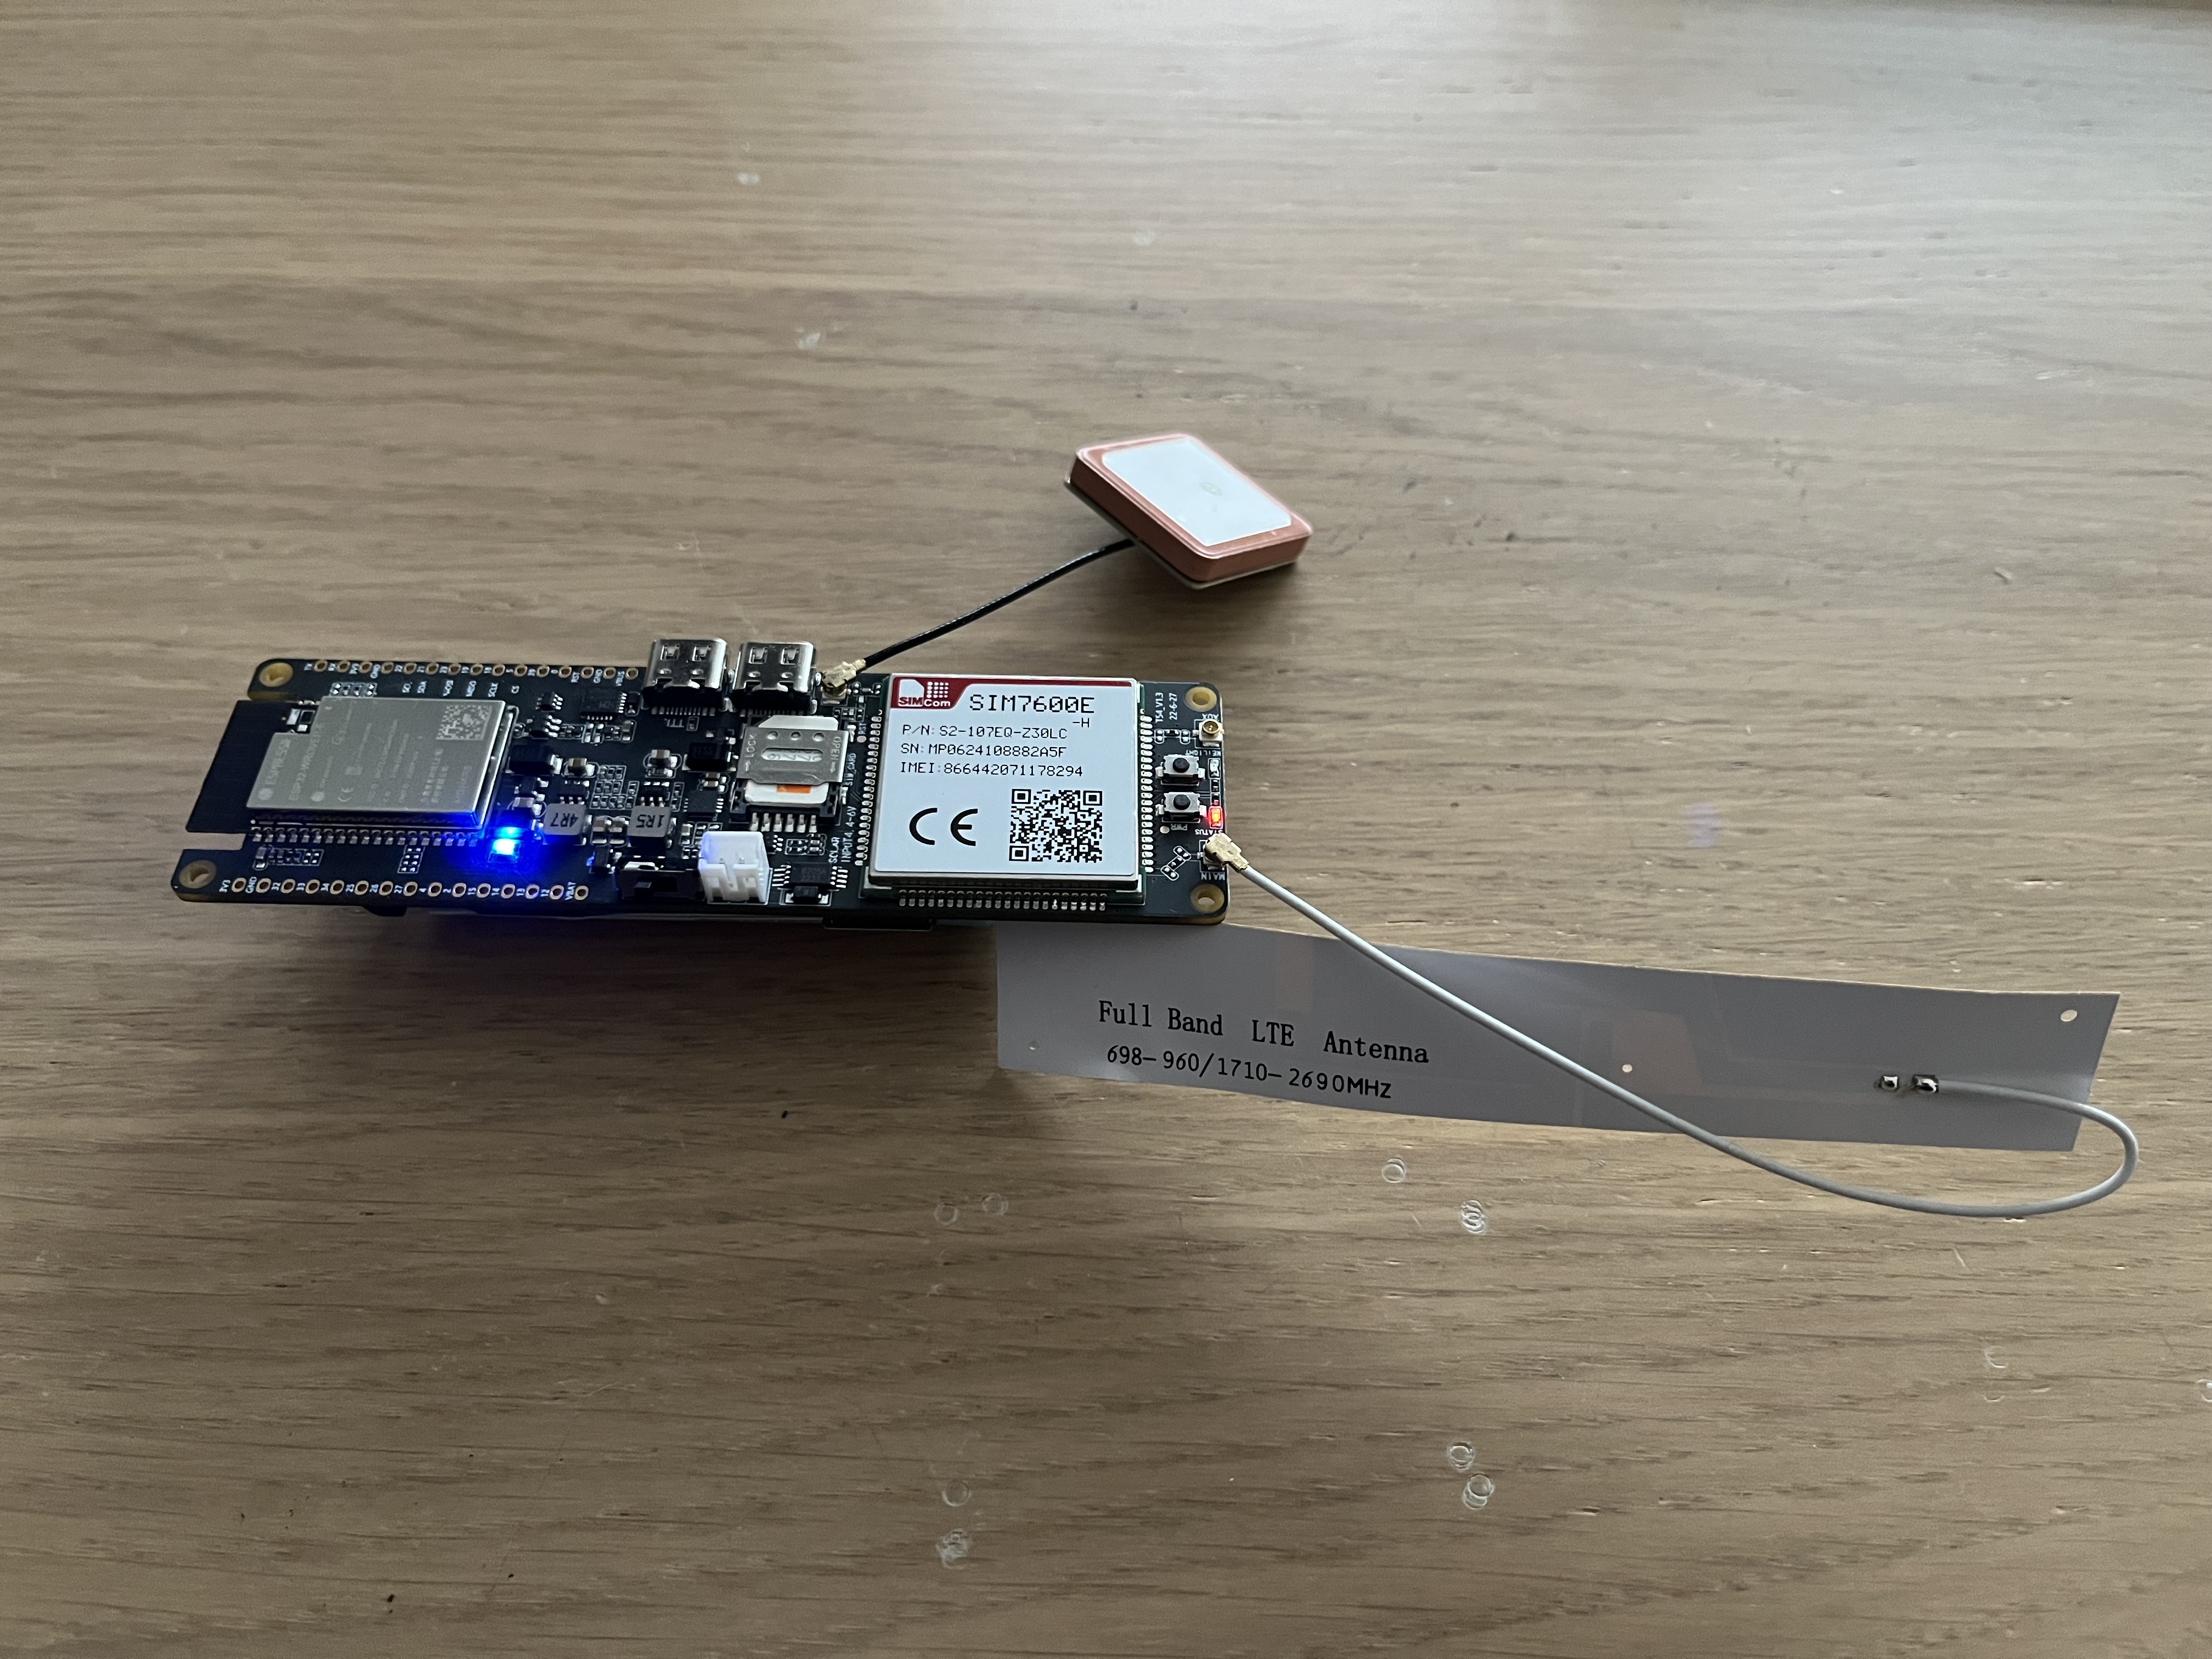
Project based on the LilyGo T-SIM 7600G
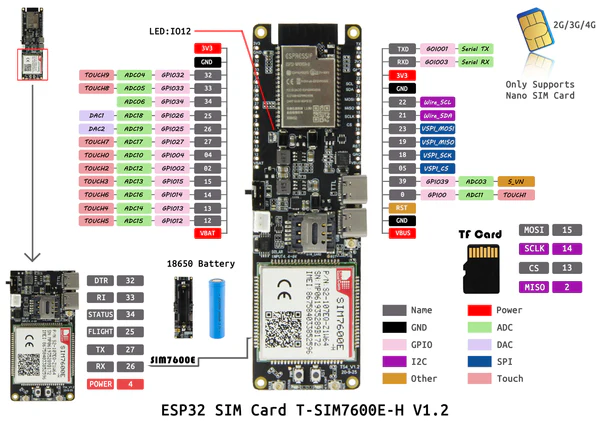
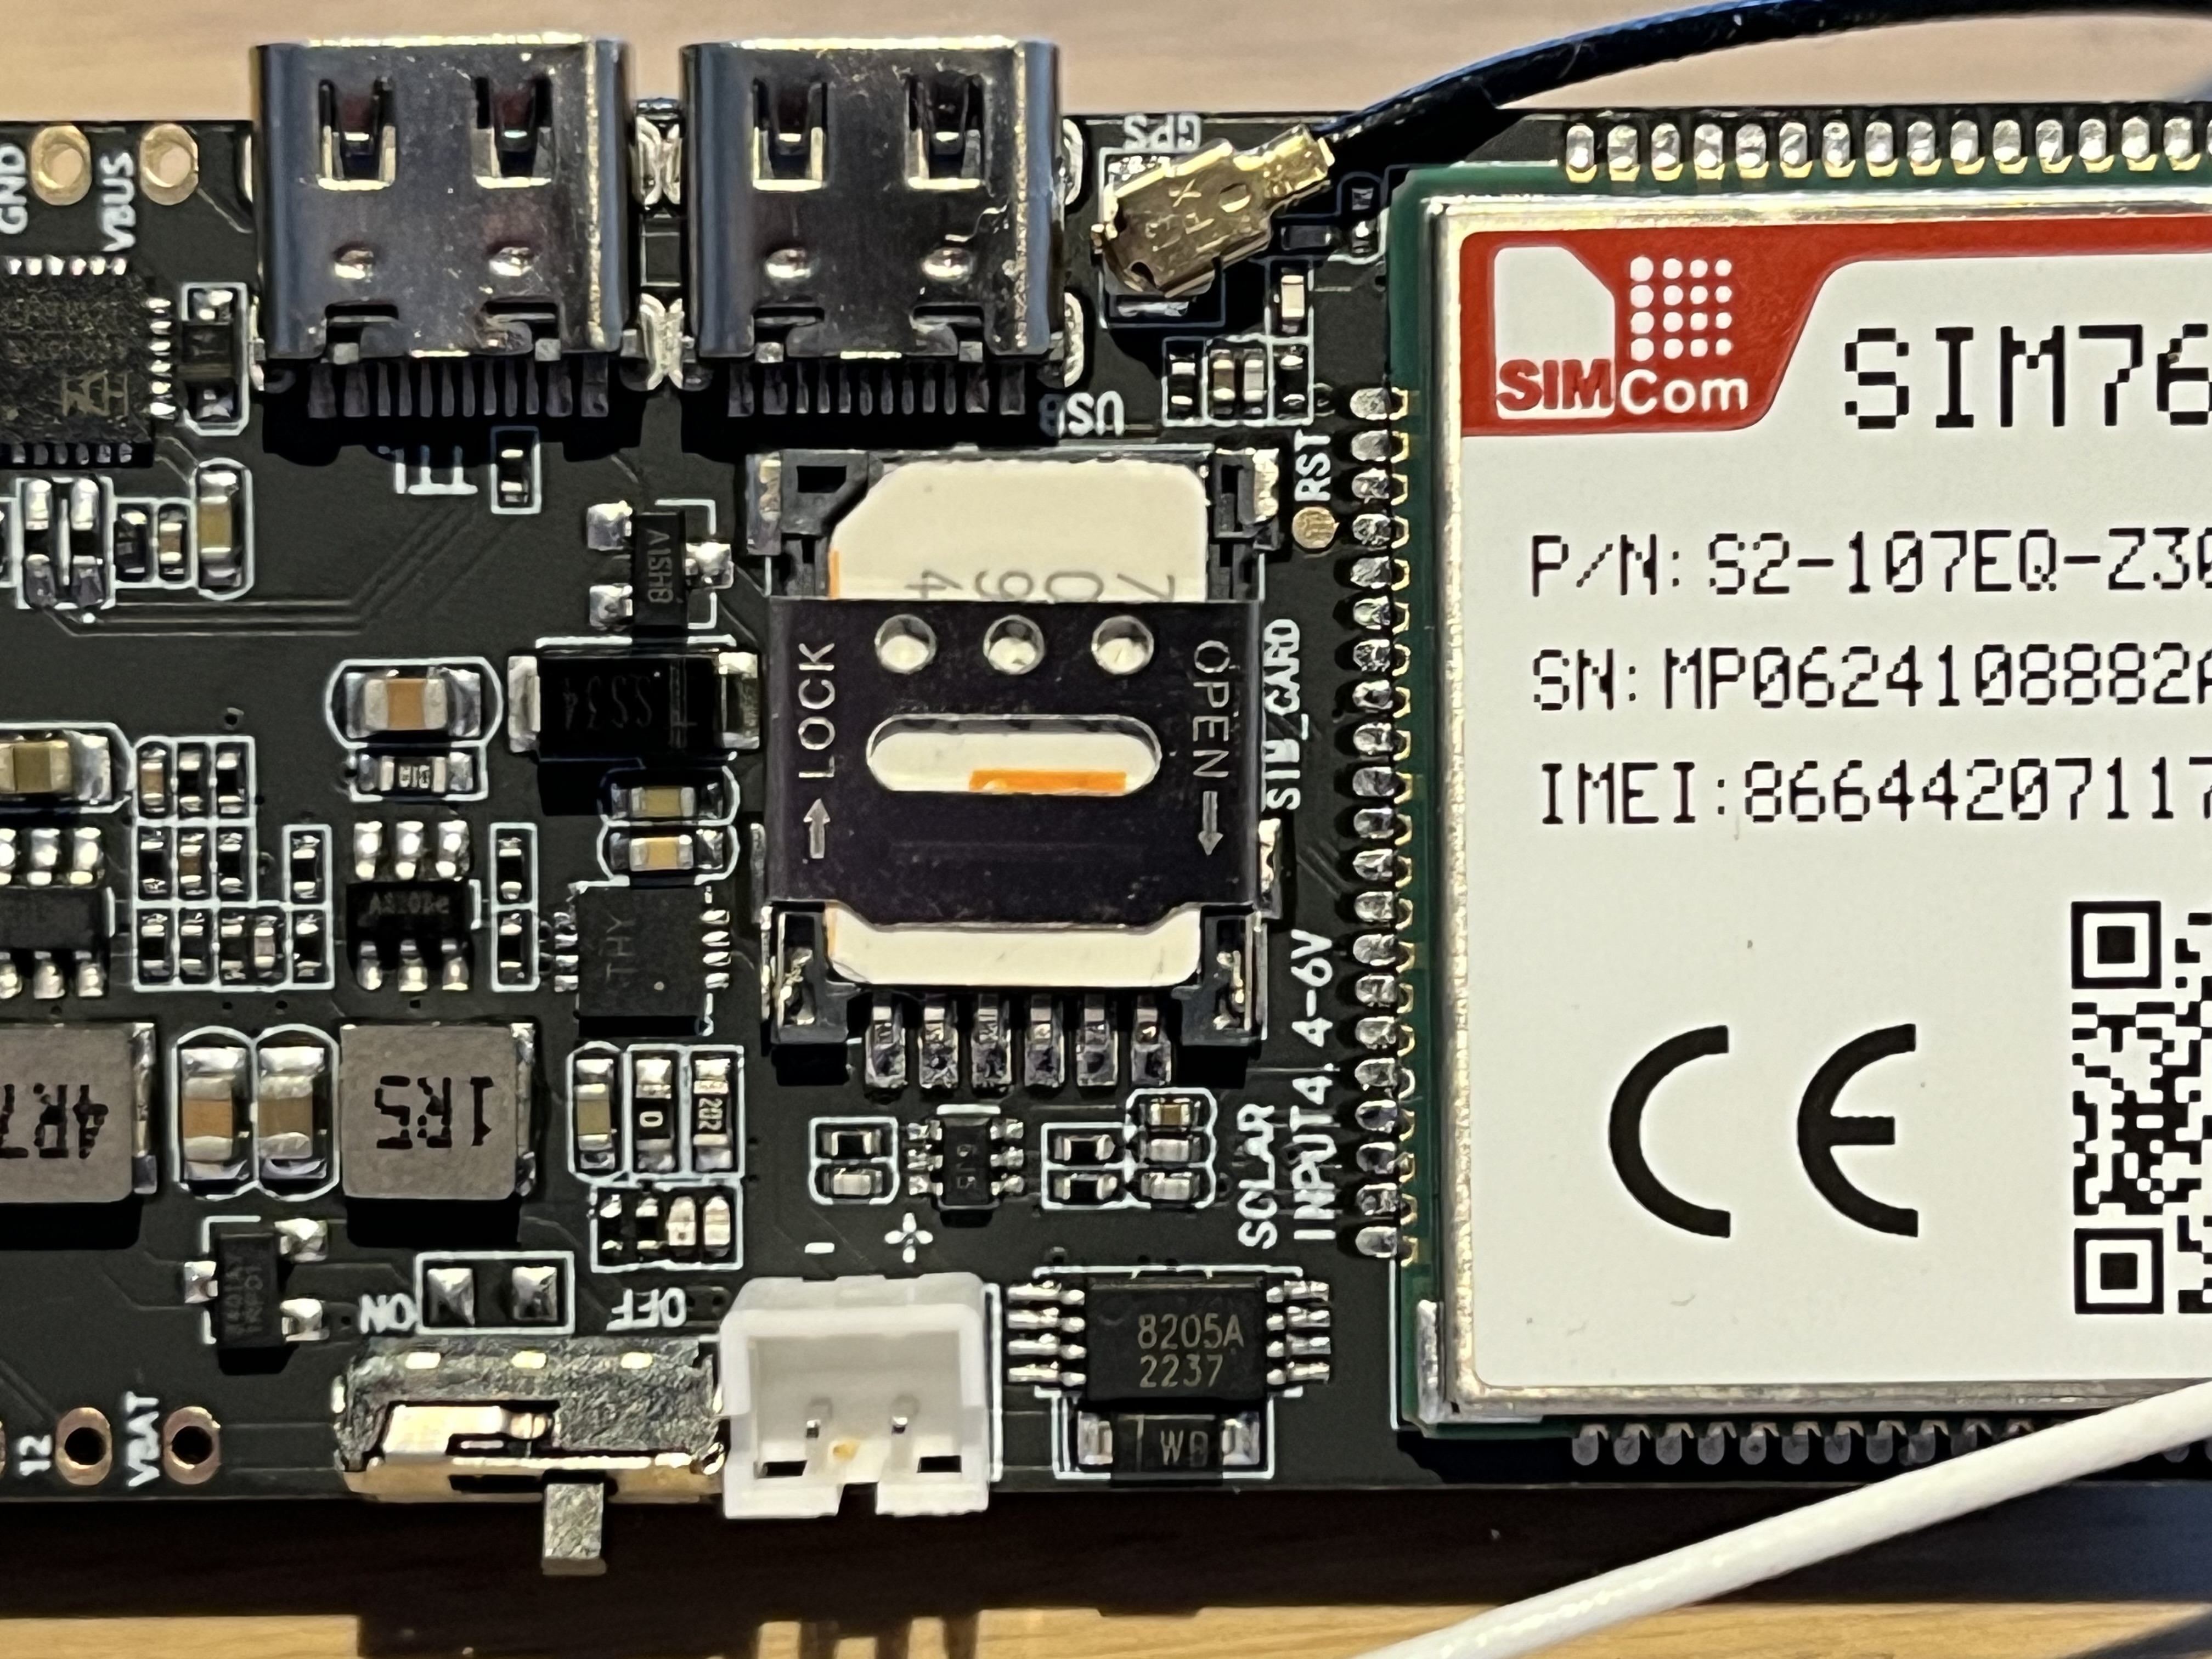
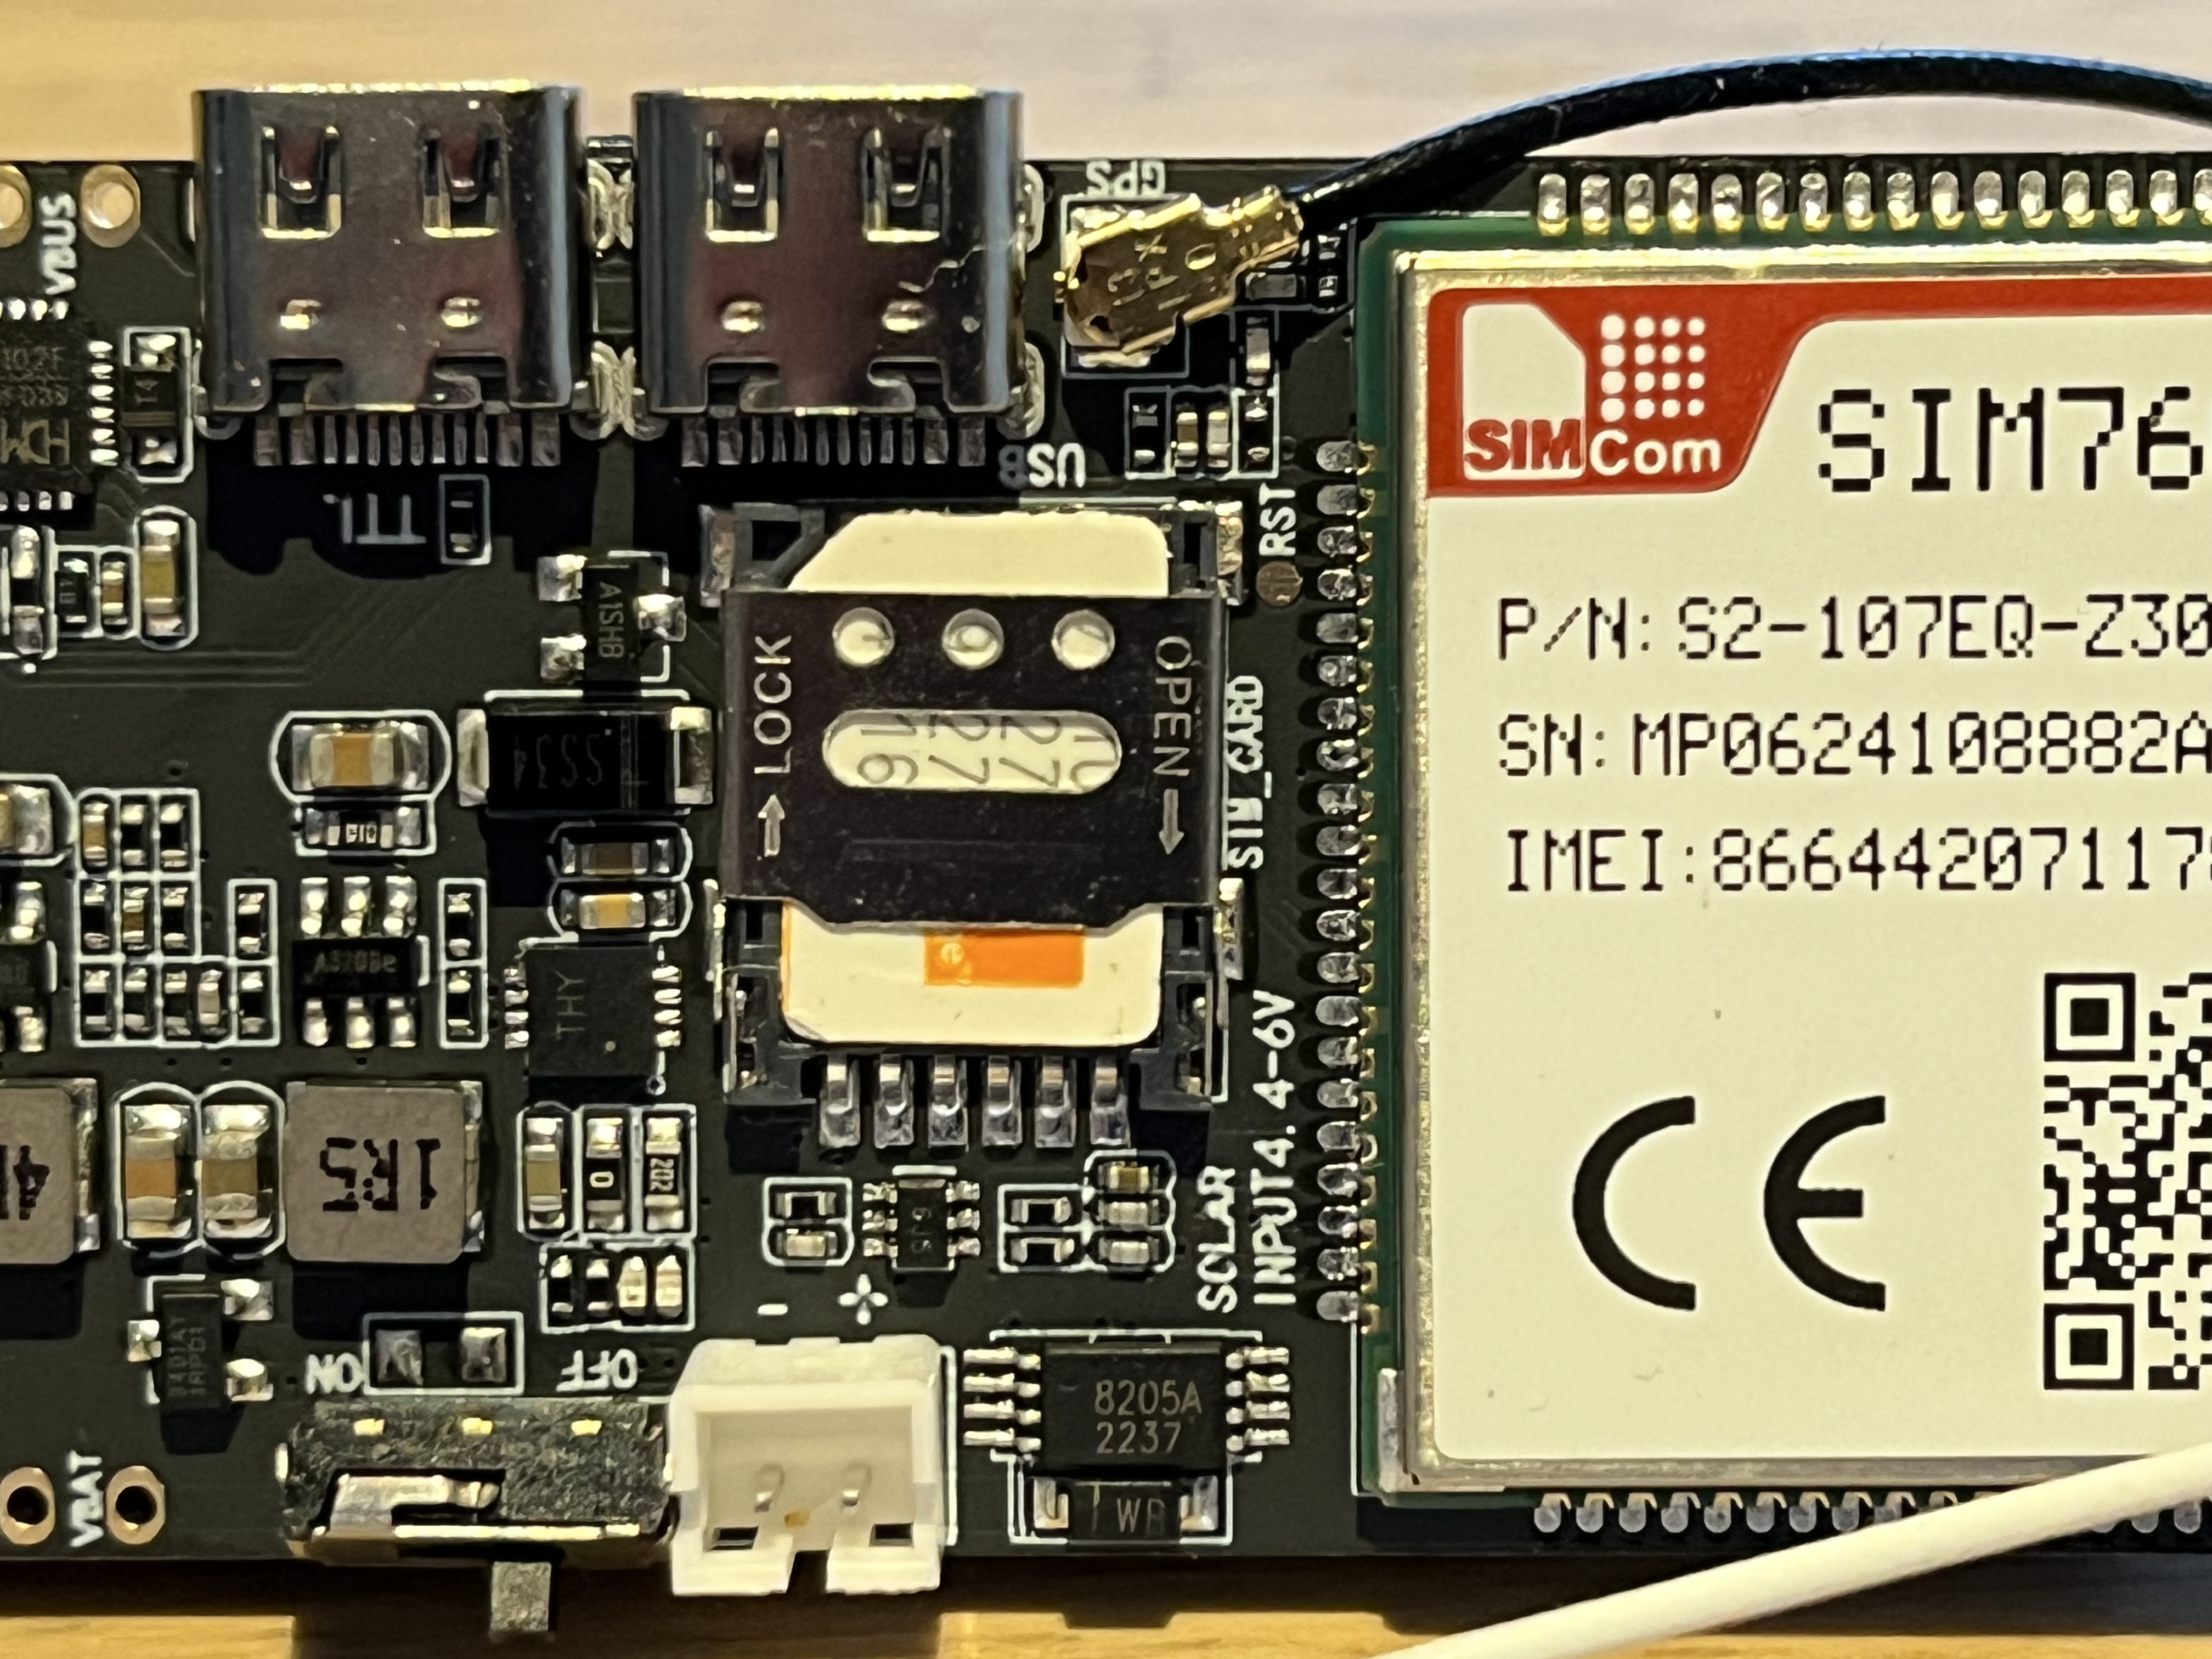
The LilyGo T-Sim 7600G is a development module from LilyGo , this module includes:
- ESP32 Wroom.
- GPS module (Cat 4, GPS/GLONASS).
- GPRS modem (4G/LTE, 150 Mbps max, includes LTE, HSPA, WCDMA and GPRS/EDGE).
- Nano SD interface.
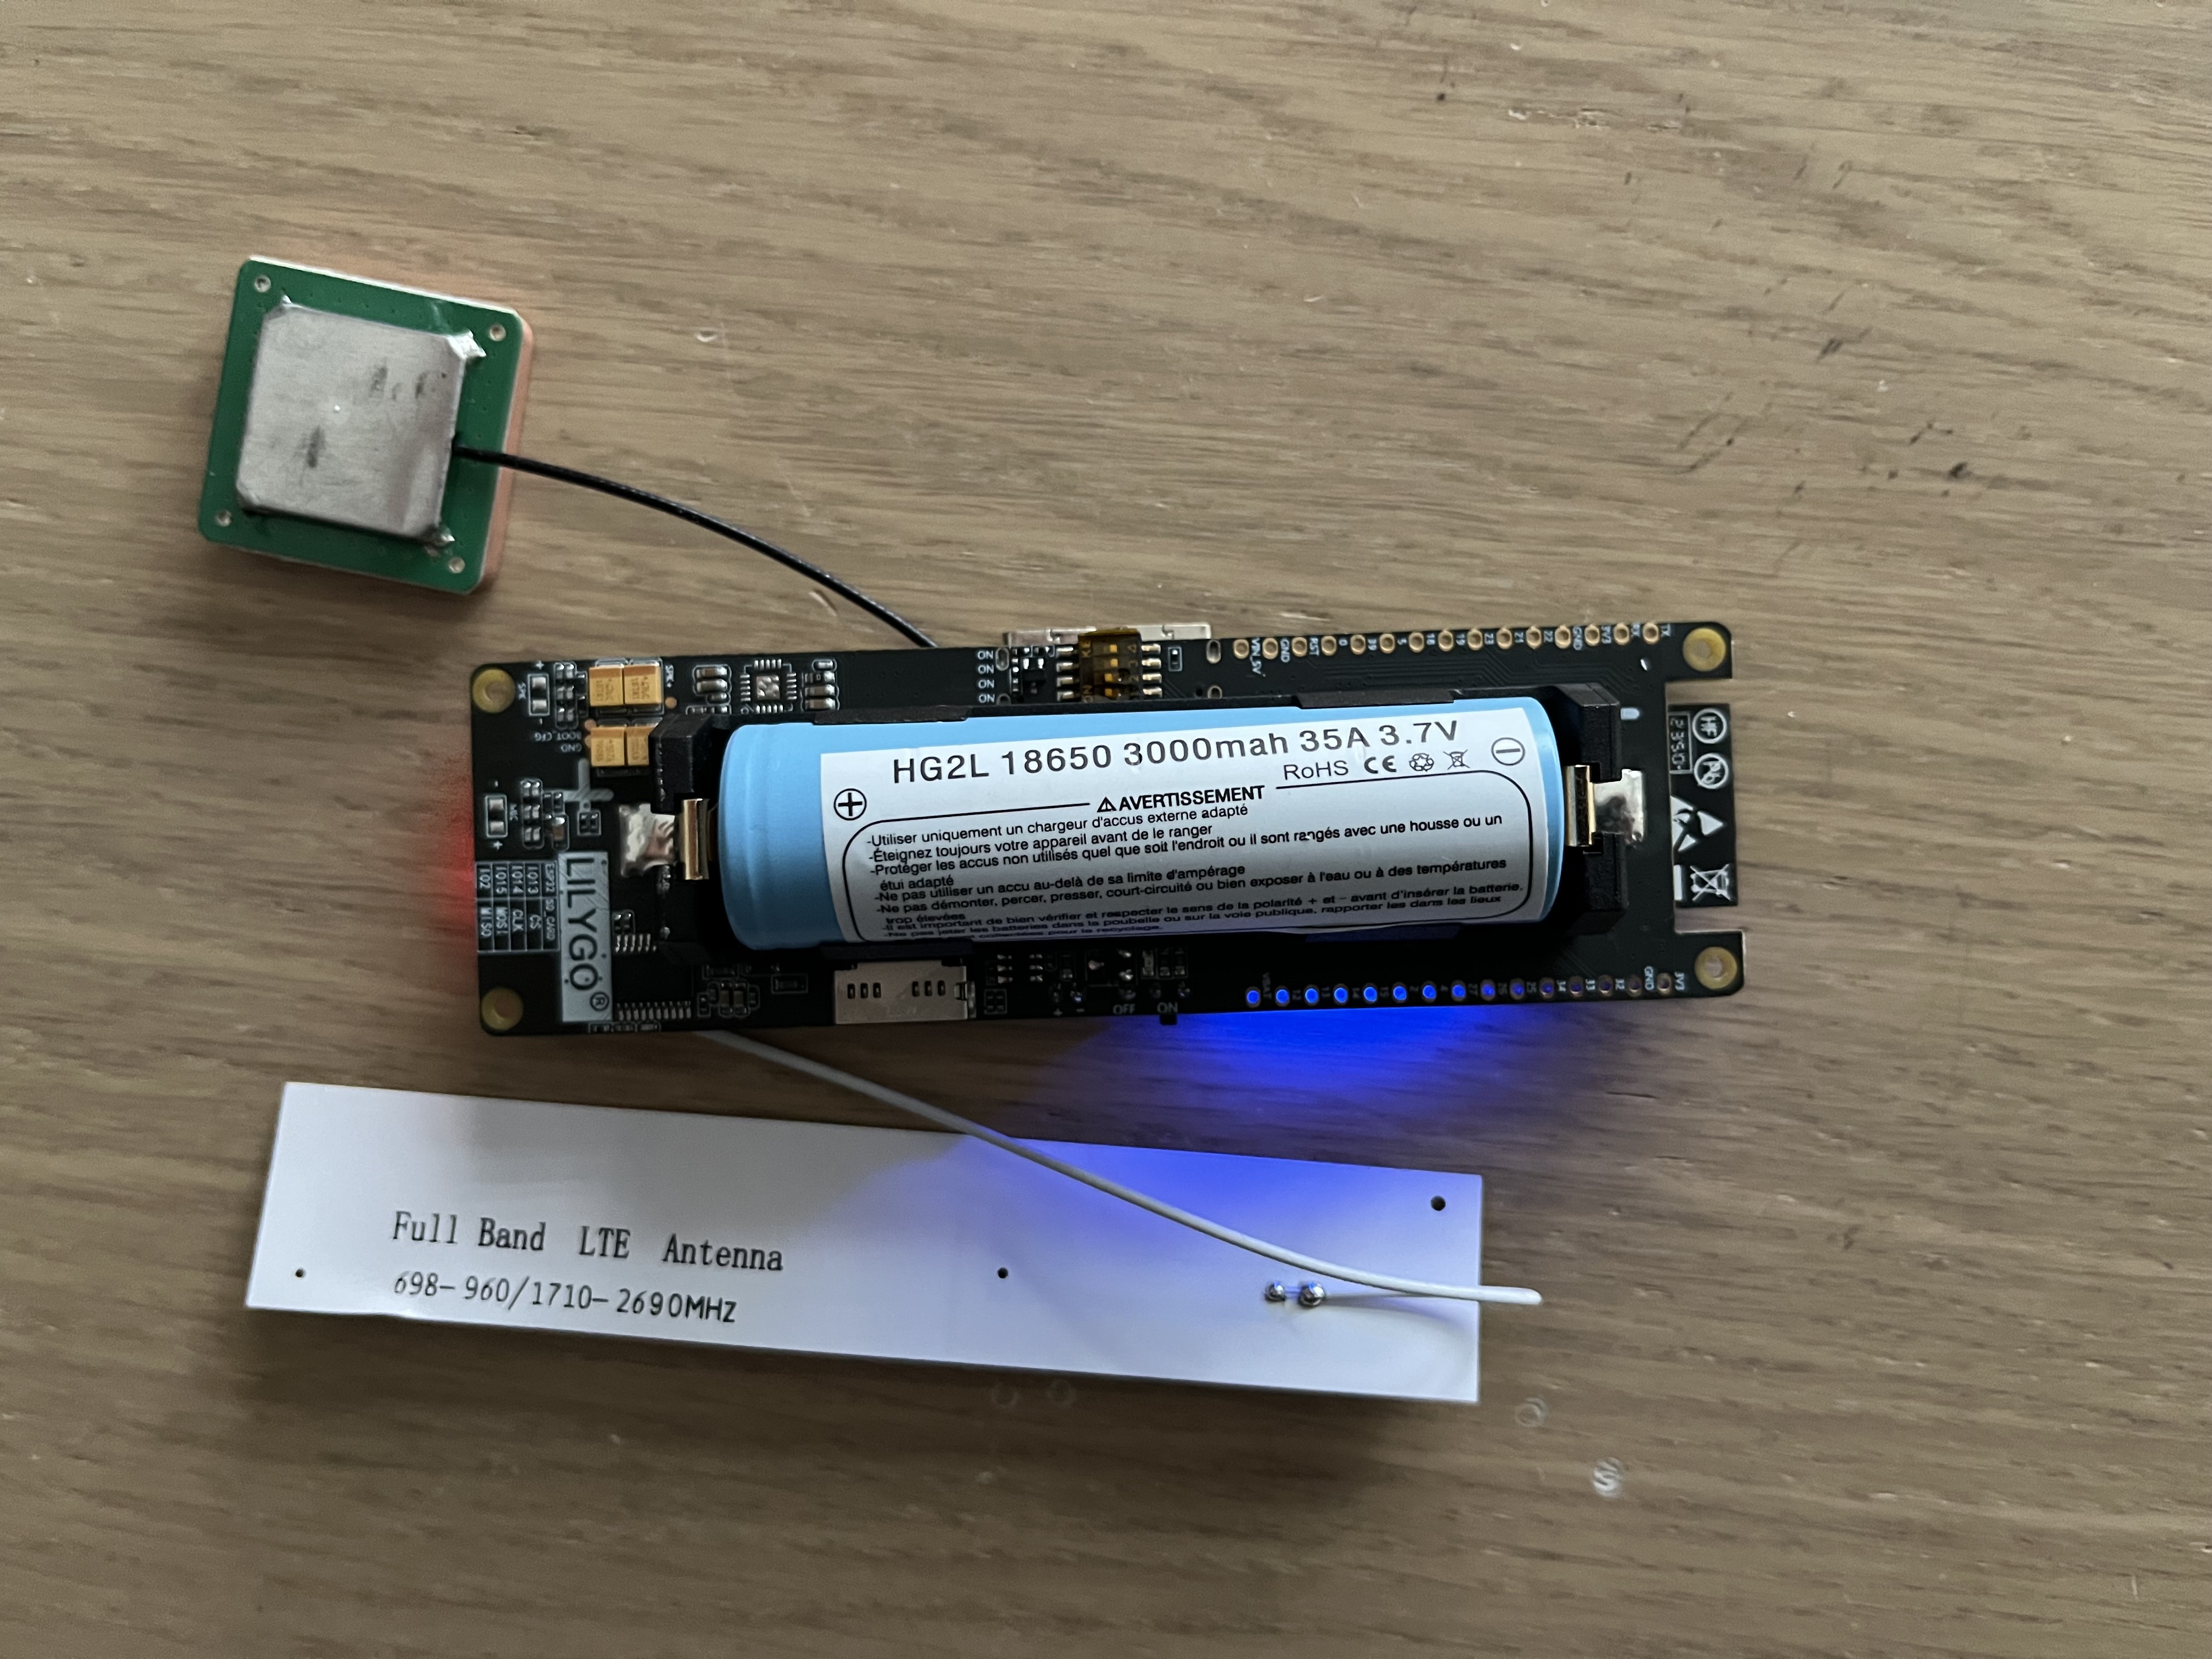
- Battery Holder (common battery 18650).
- Dual USB-C interface (One for firmware upload and chip control, the other for using the module as a PC wireless network card).
- Some modiel include an audio decoding chip.
- Solar panel battery charger.
Interface with the PC for the programmation
A USB driver is available for Windows (7/8/10/11), Linux, OSX (Mac’s), Chinese Manufacturer english page’s broken, see here for an English version .
I have tried these successfully on OSX 15.3.1 (mac silicon, after installation the mac needs to be rebooted) and on windows 11 and last but not least on a Raspberry pi 5 Debian 12.08 where no driver installation was necessary.
Using the arduino's developement IDE , the board selected is the LilyGo T Display, on the OSX and Raspberry it was recognized by the IDE as soon as the serial port was selected.
The module cost around 60 €, I got mine from TinyTronics in the Netherlands for 60€, it’s the T-SIM7600E-H which support LTE Cat 4 (150/50 MBps), the T-SIM 7600E is also avalabile for 55 € but only sports the LTE Cat 1 (10/5 Mbps).
The modem within the module is accessible via a serial connexion AT command Manual .
Note that one may use the different parts of the kit on their own, an ESP32 and a SIM7600E-L1C LTE GNSS Module , the SIM module including the GPRS and the GPS modules, interfacing with the ESP via TTL serial.
Testing
First of all I tested the PC connexion, using Arduino’s IDE and the Serial Monitor, when I got it working (quite straightforward actually), I moved on with the GPS reception test.
I used the code from LilyGo github GPSDebug example Don’t forget to include the necessary libraries (eg TinyGsm,TinyGPS+)+ the compiler will complain if they are missing, just get them from the standard libraries. In order to get GPS signal from the satellites,the device need to be put outside for a while (10/15 minutes) and running on the battery. After that I connected it back to the computer and could read the last GPS position readings on the Serial Console.
So far so good.
Next, using this project from electroclinics that puts in action the GSM network. I got a prepaid sim card and installed it on the T-SIM, gently pull the shiny cover backward and gently lift it, insert the sim and put the cover back in place.
This code will enable the GSM modem, connect the network (PIN is disabled on the sim), changed the number for default SMS, receive SMS and respond accordinlgy, that’s about it.
Sim card installation
Unlock the sim card holder
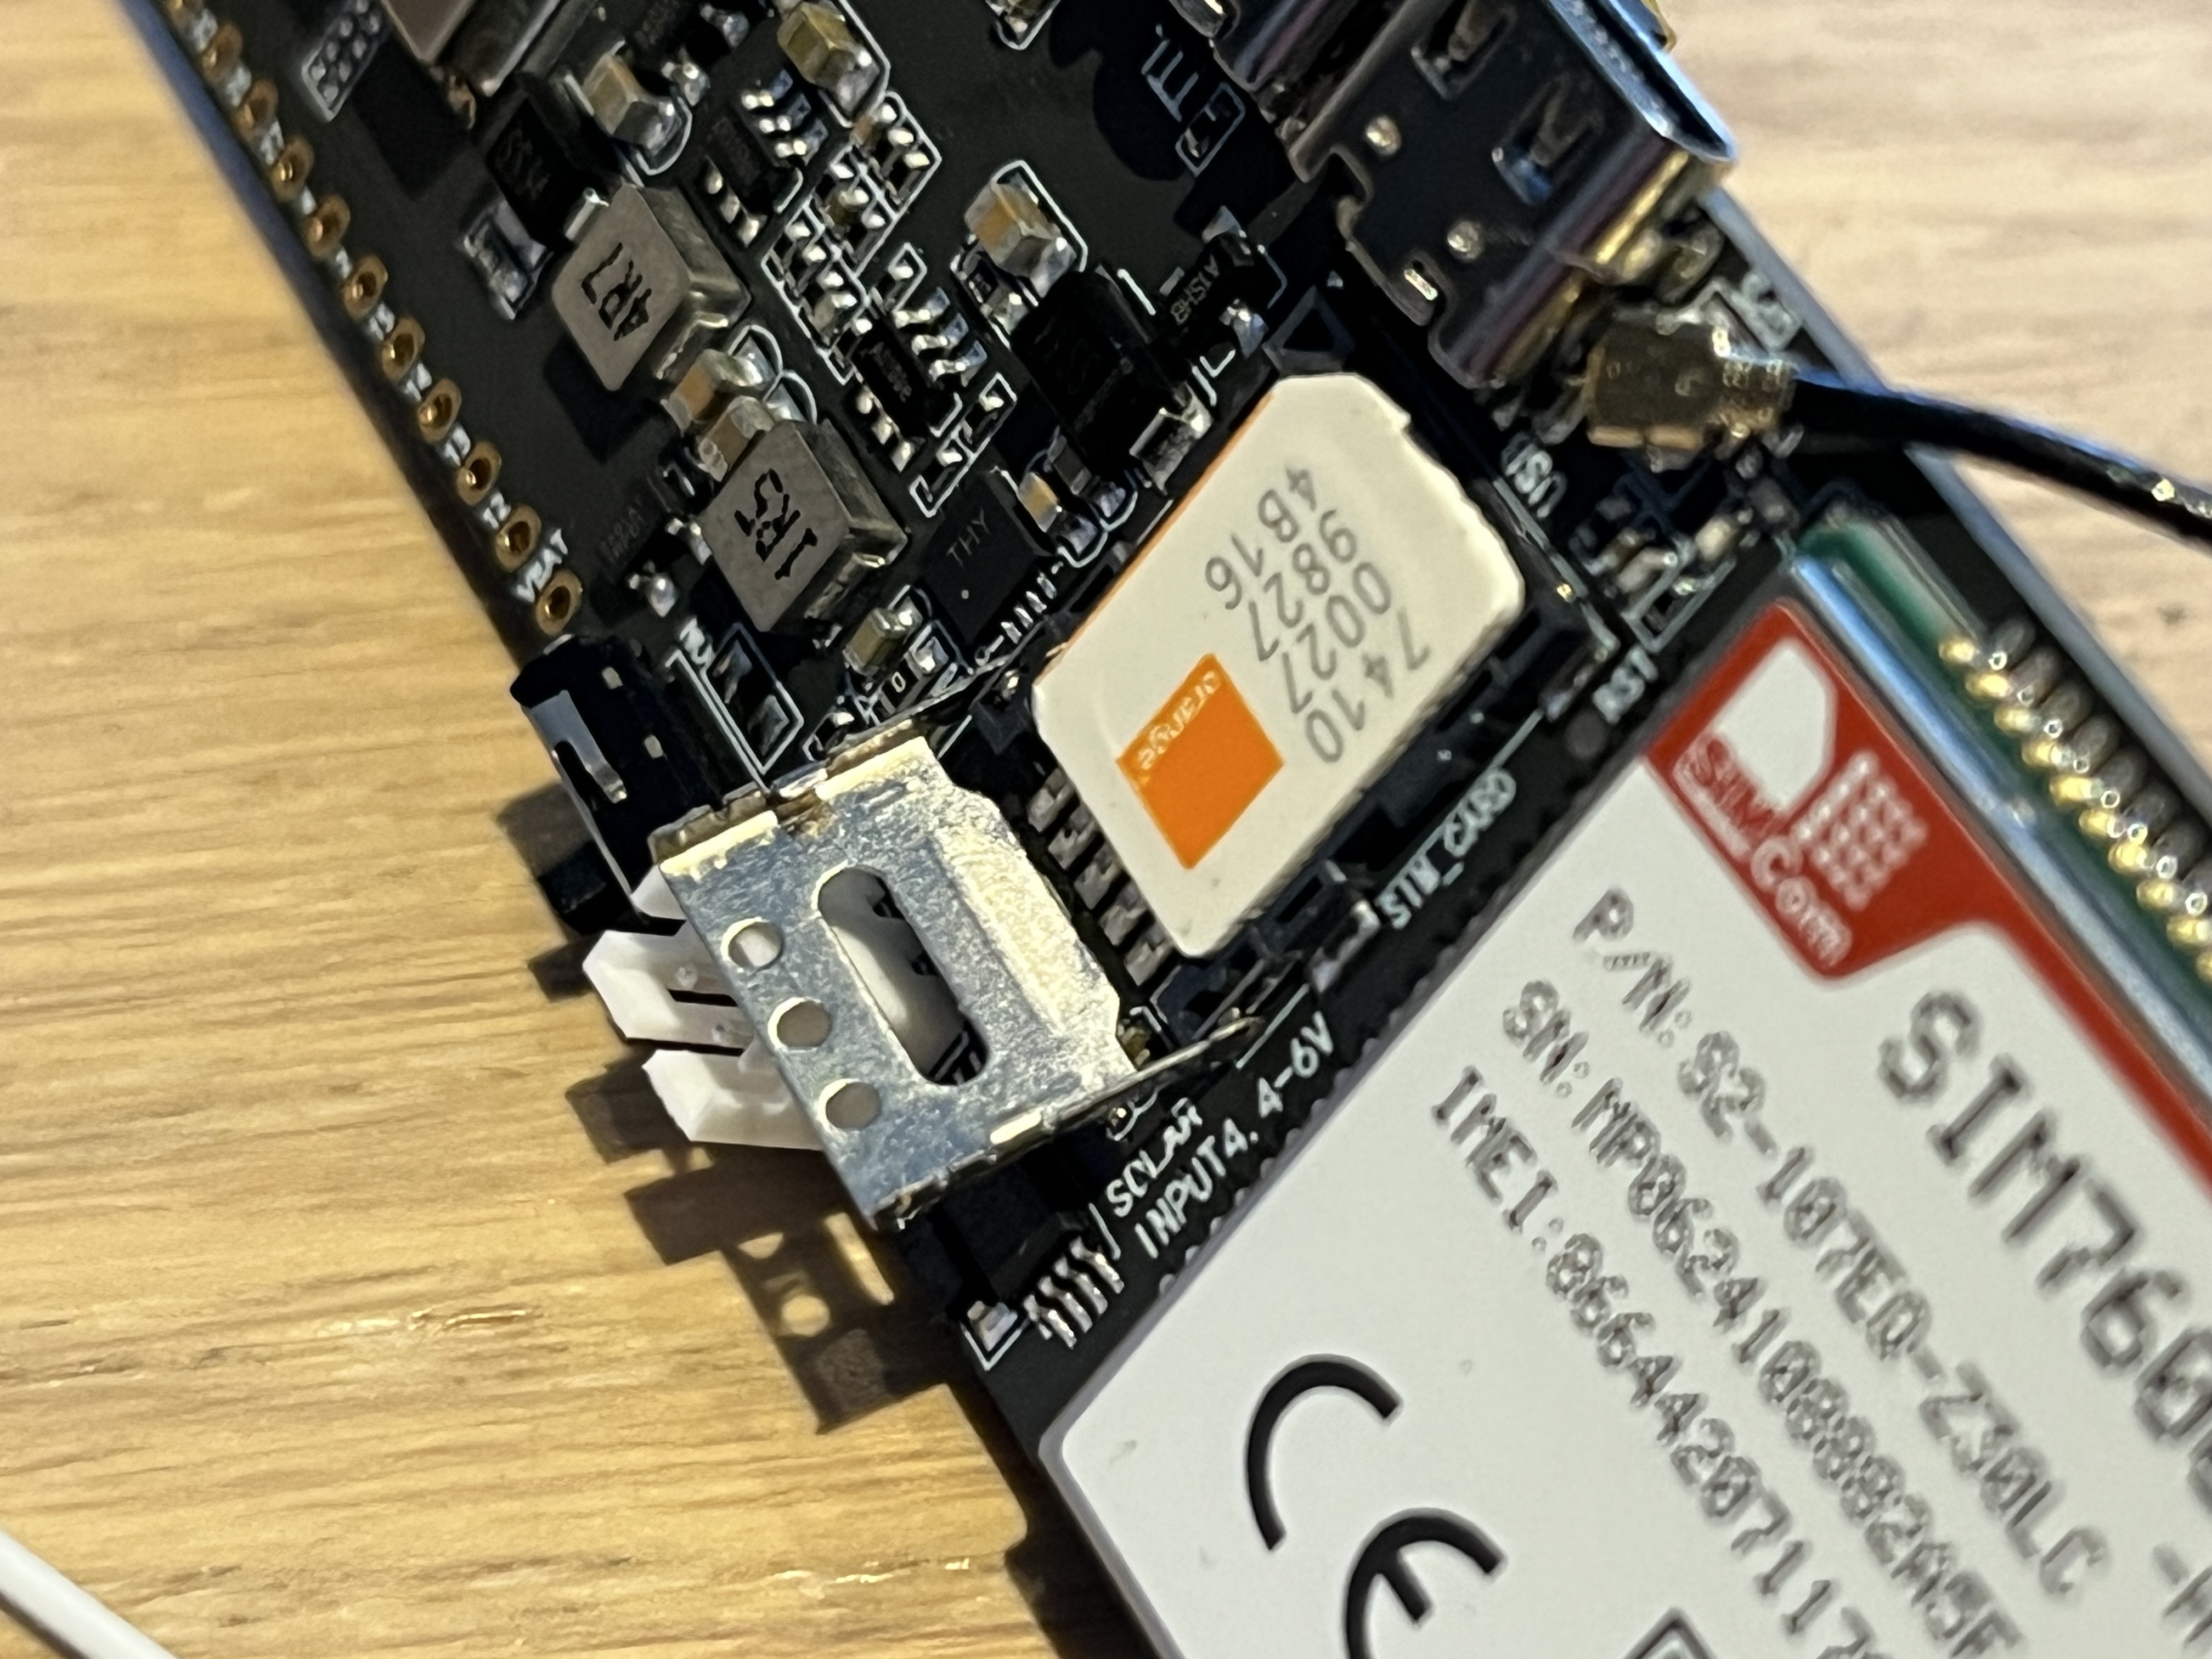
Close the holder
Lock the holder
How does it work
Sending an SMS with text location will trigger a read of the GPS positional data and an SMS will be sent back to the requesting phone with a google map URL. The inquirer can click on the URL to get the location on a map.
Which on my iPhone gives me:
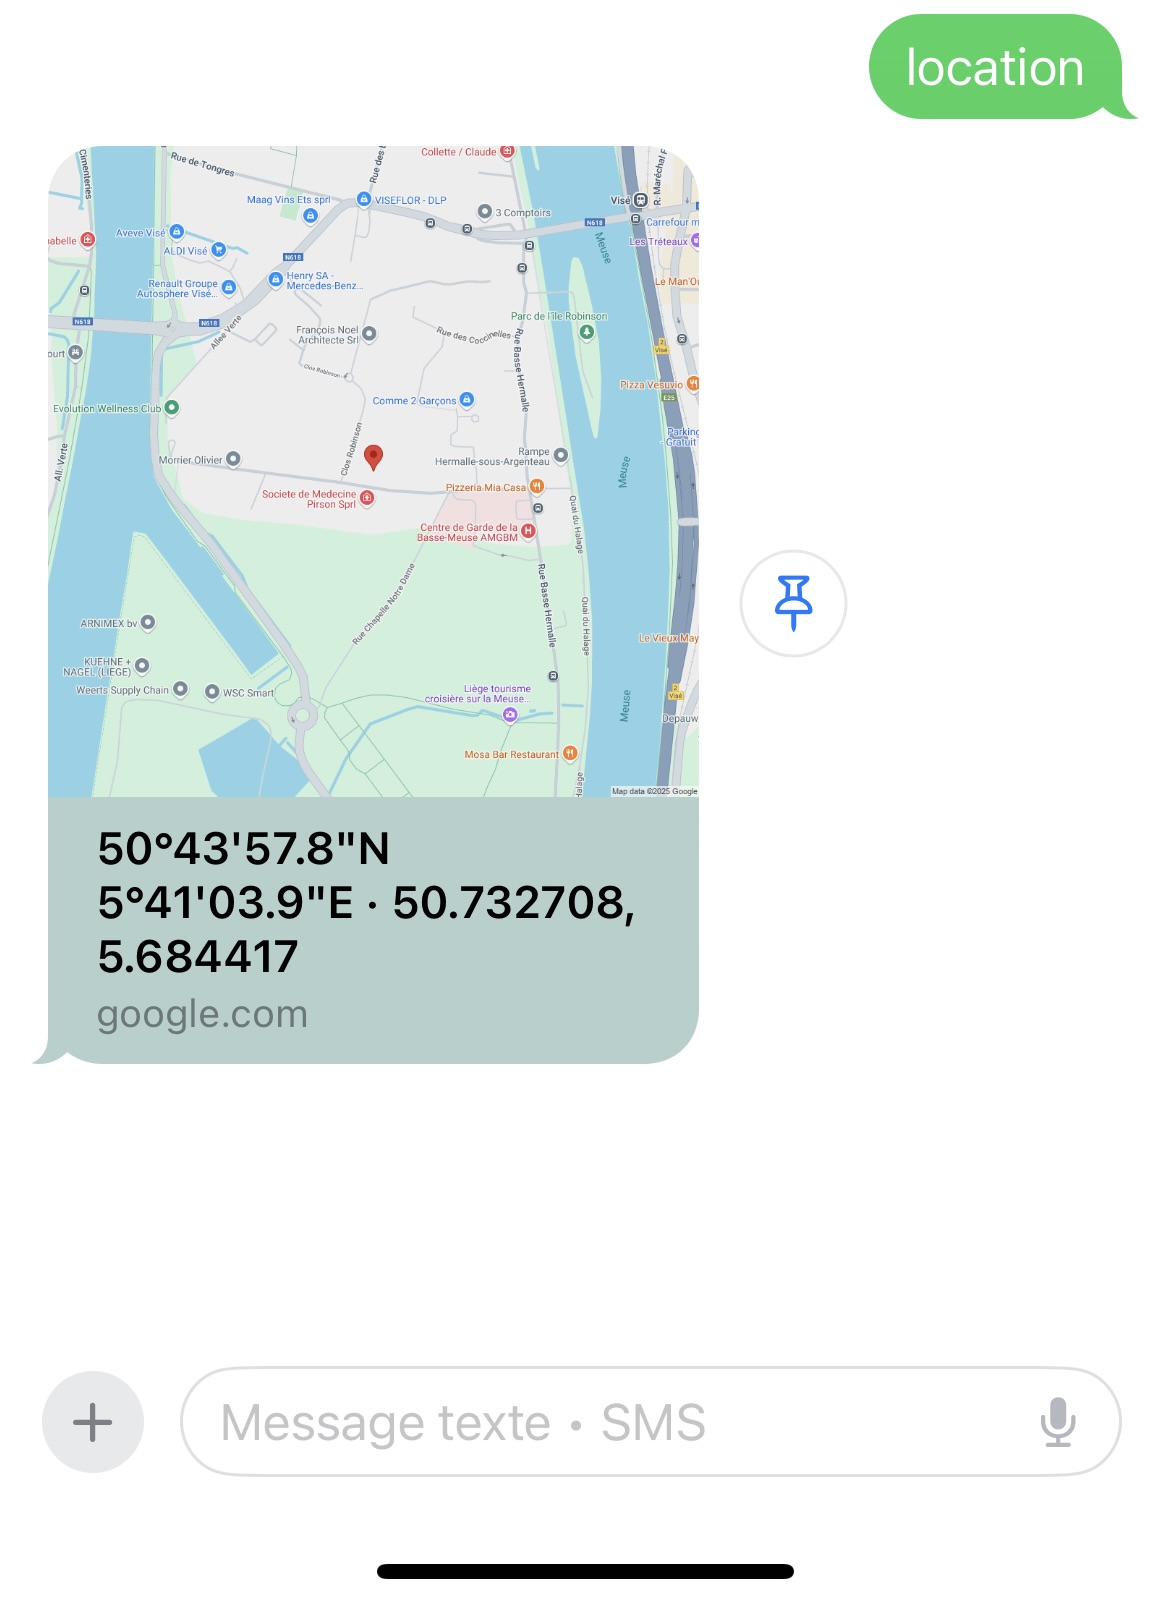
Pretty cool.
The Intercommunication setup
Using 4G and internet
To transmit the data collected at the GPS, I will use the MQTT API provided by the modem.
Why use MQTT and the Internet rather then SMS ?
On my prepaid, MB are cheaper than SMS to start with (6 cents per SMS vs 0,3 cents per MBytes).
I believe SMS are more reliable than 4G (but this may not be true as the 4G network becomes more resilient), so they can still be used in case the 4Gcoverage is not too good
Command to the board are sent via SMS to activate/deactivate services within the device itself as the SMS reception doesn’t cost anythinga and they can thus be send by anyone, security can be implemented on the basis of the SMS phone number issuer.
WiFi is enabled for testing and development purposes. A telnet server is implemented inside the device. so I can access the device from anywhere within my WiFi coverage.
The code has been adapted to send mqtt location to a mosquitto broker, the broker being connecte to the Internet via GPRS (4G). The server running the broker is running my web servers. The server is secured by TLS/SSL and can be accessed through mqtt or websocket.
Web application displaying the location and traject of the GPS device.
The first Web application has been developped using REACT , but due to highly complex interactions between the modules it was abandonned for pure javascript.
The javascript displays a leaflet map in order to plot the location of the GPS device.
Cartographical Maps can be selected from various providers, openstreetmaps, google maps, MBT (Mountain bike itineraries), Waymarket, ESRI (Satellite/street/Hybrid/terrain) from a selection widget


Maps are dynamically selectable via a select widget (top left).
A vehicle icon can be selected from a list of available ones in a select box.
When the device sends an Mqtt message with its location, it gets ploted on the map, the day’s trajectory can be displayed using the show track button/tick box.
A simulator is impemented, it can read the locations from a file and play them back (select History/Simulator tick box to enable it, then select one of the files from the History widget.

Interprocess communication relies on MQTT (location messages, status, commands, available history files).
User Interface via usual HTML widgets driven by javascript.